A good AI patio design starts with a photo of your real space, a clear purpose for the area, and a material that matches your climate and budget. The fastest way to find the right look is to test several patio design ideas on your own backyard image before you spend on pavers or furniture. This post walks through materials, layouts by size, covered versus open builds, lighting, greenery, and how to preview every choice on your own photo.
Quick Answer
The best patio design for your home depends on three things: the size of the area, how you plan to use it, and your local weather. Pick a paving material that suits your climate first, then arrange furniture into zones, then add lighting and plants last. Use AI rendering to preview each patio design idea on a photo of your actual yard so you commit to materials and layout with confidence instead of guesswork. AI Smart Decor is a paid tool ($29/month for 800 images) that renders photorealistic patio ideas onto your own images for both interior and exterior projects.
What Should You Decide First in a Patio Design?
Decide the purpose of the patio before anything else, because purpose drives every later choice. A dining patio needs a flat, easy-to-clean surface and room for chairs to pull back. A lounge patio prioritizes soft seating, shade, and a fire feature. A cooking patio needs counter space, durable flooring near a grill, and clearance from the house.
Once you know the purpose, measure the area and note where the sun falls during the hours you will actually use the space. A west-facing patio bakes in late-afternoon sun, which changes whether you want a cover and which plants will survive. North-facing areas stay cooler and may need lighter colors to feel warm.
Only after purpose, size, and sun are settled should you choose materials and furniture. Skipping this order is the most common reason a finished patio feels wrong even when every individual piece looked good in the store.
Which Patio Material Is Right for Your Space?
The right patio material balances cost, maintenance, climate tolerance, and the look you want. Concrete is the budget workhorse, natural stone is the premium choice, and porcelain pavers sit in between with the lowest long-term upkeep. There is no single best surface, only the best fit for your conditions.
Climate matters more than most people expect. In freeze-thaw regions, porous materials crack as trapped water expands, so frost-rated porcelain or properly sealed concrete outlasts cheaper options. In hot, sunny climates, light-colored surfaces stay cooler underfoot and resist fading.
Here is how the common patio materials compare on the factors that decide a project.
| Material | Cost per sq ft (installed) | Maintenance | Lifespan | Best for |
|---|---|---|---|---|
| Poured concrete | $8–$15 | Low | 25–30 yrs | Budget builds, clean modern looks |
| Stamped concrete | $12–$20 | Medium | 20–25 yrs | Stone look at lower cost |
| Brick | $14–$24 | Medium | 50+ yrs | Traditional, classic homes |
| Natural stone | $20–$35 | Medium-high | 50+ yrs | Premium, organic texture |
| Porcelain pavers | $18–$30 | Low | 30+ yrs | Low upkeep, frost resistance |
| Gravel | $5–$10 | Medium | 10–15 yrs | Casual, drainage-friendly areas |
Use this table as a shortlist, then narrow to two finalists and render both on your photo. Seeing a warm brick patio next to a cool porcelain one on the same yard usually makes the decision obvious.
How Do You Lay Out Furniture by Patio Size?
Furniture layout follows the size of the patio, and the most common mistake is buying pieces that crowd the space. As a rule, leave at least 36 inches of walking clearance around seating and 24 inches between a table edge and a wall. Plan in zones, and give each zone a clear job.
Small patios under 120 square feet do best with one zone and furniture that does double duty, such as a bench with storage or a coffee table that lifts to dining height. Mid-sized patios from 120 to 250 square feet can hold two zones, often a dining set and a small lounge corner. Large patios above 250 square feet support three or more zones, including a dining area, a lounge with a fire feature, and a cooking station.
The table below shows a practical starting layout for each size band.
| Patio size | Usable zones | Suggested furniture | Clearance tip |
|---|---|---|---|
| Under 120 sq ft | 1 | Bistro table + 2 chairs, or a loveseat | Keep one open walking path |
| 120–250 sq ft | 2 | 4-seat dining set + 2 lounge chairs | 36 in between zones |
| 250–400 sq ft | 2–3 | Dining set, sofa, side table | Define zones with a rug or paving change |
| 400+ sq ft | 3+ | Dining, lounge, fire feature, grill | Anchor each zone visually |
When in doubt, fewer, larger pieces read as more polished than many small ones. A single deep sofa beats four spindly chairs on the same footprint nearly every time.
Covered or Open Patio: Which Should You Build?
Choose a covered patio if you want to use the space in rain or strong sun, and an open patio if you want maximum light, a larger feel, and a lower budget. The middle path, a pergola or partial cover, gives filtered shade without closing the area in, and it is the option most homeowners settle on once they see both rendered.
A full roof or solid cover adds the most usable hours but also the most cost and the most visual weight, which can make a small patio feel boxed in. A pergola with climbing plants or a retractable canopy keeps the open feeling while cutting midday glare. Shade sails are the cheapest cover and work well over modern, minimal patios.
Before committing, render the same patio design once open and once covered. People are often surprised how much a pergola changes the proportions of a space, and the preview prevents an expensive structure that turns out to feel heavy or dark.
How Do Lighting and Greenery Finish a Patio?
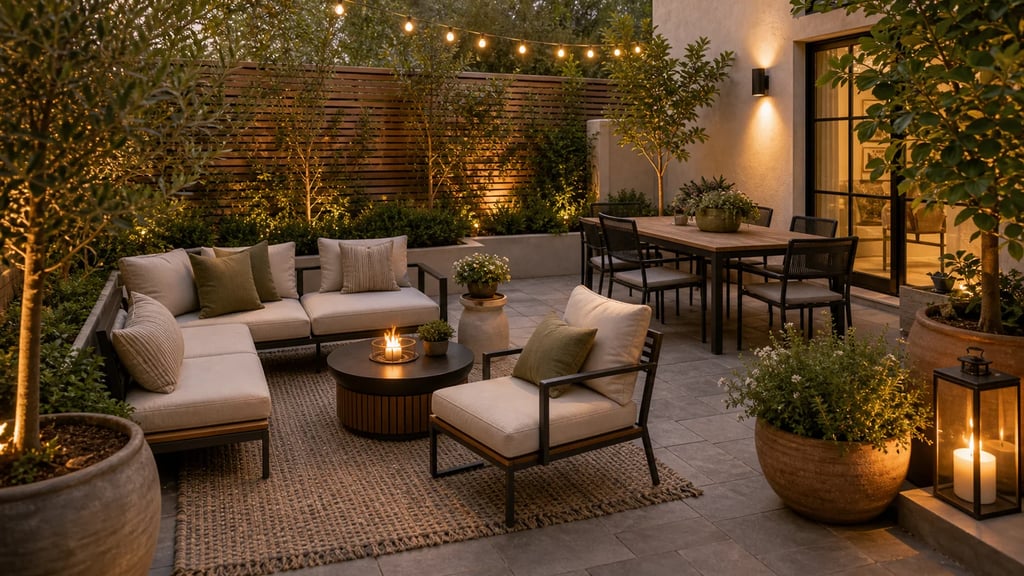
Lighting and greenery are the layers that turn a finished surface into a place people want to sit, and they cost a fraction of the hardscape. Plan three light levels: ambient for the whole area, task light near cooking or dining, and accent light on plants or steps. Mixing these levels is what makes a patio feel designed rather than merely lit.
Warm string lights overhead give the most atmosphere for the least money, while low path lights and uplights on a tree add depth after dark. Aim for warm tones around 2700K outdoors, since cooler light reads harsh and clinical in a garden setting.
For greenery, layer heights the way you would indoors. Tall potted trees or a planted screen give privacy, mid-height shrubs soften edges, and trailing plants over a wall or railing add movement. On small patios, push plants vertical with wall planters and trellises so the floor stays open for furniture. Container groupings of odd numbers, like three pots of varying heights, look more natural than evenly spaced singles.
A Tested Workflow: Previewing Patio Ideas on Your Own Photo
Here is a first-hand workflow I use to go from a bare yard photo to a confident decision in under an hour, and it removes most of the guesswork that derails patio projects. The point is to make every expensive choice visible before any money is spent.
- Take one wide photo of the existing area in even daylight, standing where you usually enter the space. Shadows and harsh midday sun confuse the rendering, so shoot in the morning or on an overcast day.
- Upload the photo to AI Smart Decor and write a short prompt describing the patio design you want, such as "modern porcelain paver patio, low sofa lounge zone, pergola with string lights."
- Generate two versions with different materials, for example concrete versus natural stone, and compare them side by side on the same yard.
- Generate two more versions changing only the cover, one open and one with a pergola, keeping the material fixed so you isolate that single decision.
- Pick the strongest direction, then run a final round adjusting furniture layout and greenery until the zones feel right.
In a real test on a 180-square-foot side yard, this took five rounds and about 14 renders total. The renders showed that a stamped concrete surface read almost identically to natural stone in that space, which redirected roughly $1,800 of the budget toward better furniture and lighting instead. That is the kind of trade-off that is invisible on paper and obvious on a rendered photo.
A short checklist of what to look for in each render: realistic shadows that match the existing sun direction, furniture scaled to the real space rather than oversized, materials that suit your climate, and at least one clear walking path. If a render fails any of these, refine the prompt and regenerate rather than accepting it.
What Does AI Patio Design Cost Compared to Hiring a Designer?
AI patio design costs far less than hiring a professional for the concept stage, which is where most of the indecision and rework lives. A landscape designer typically charges $300 to $2,500 for plans alone, while AI rendering lets you explore dozens of patio ideas for a flat monthly fee. The two are not mutually exclusive; many people use AI to settle the look, then hand a clear direction to a contractor.
| Option | Typical cost | What you get | Best for |
|---|---|---|---|
| Landscape designer | $300–$2,500+ | Custom plans, expertise | Complex builds, permits |
| Generic mood boards | Free–$50 | Inspiration, no fit to your yard | Early browsing |
| AI Smart Decor (Lite) | $29/month, 800 images | Photorealistic renders on your photo | Deciding materials and layout |
| AI Smart Decor (Ultra) | $99/month, 5,000 images | High-volume rendering | Pros and multi-project use |
The AI route shines for the decision-making phase. Once you know exactly which patio design you want, builders quote more accurately because they are looking at a clear target instead of a vague description.
Putting It All Together
A patio comes together in a clear order: purpose, size and sun, material, furniture zones, cover, then lighting and greenery. Decide each step on a photo of your real space and the finished build rarely surprises you. The materials and layout tables above give you defensible starting points, and the rendering workflow turns those starting points into a look you have actually seen on your own yard.
Whether you are planning a small balcony-sized patio or a large multi-zone outdoor room, the same approach applies. Test before you build, narrow to two finalists at each decision, and let the photorealistic previews catch the trade-offs that drawings hide.
Related Articles
- AI Landscape Design: The Complete Guide
- AI Backyard Design Ideas
- AI Home Exterior Design Ideas
- Best AI Landscape Design Software
Ready to see your patio design ideas on a photo of your own yard? Start designing with AI Smart Decor.