If you've never used AI home design software before, here's the honest truth: it's much simpler than you think. You don't need to know what "color temperature" means. You don't need to understand furniture scale or spatial flow. You just need a photo of your room and a rough sense of what kind of look you're going for.
This guide assumes you know nothing about interior design and have never used this kind of tool before. By the end, you'll know exactly what to do, what to expect, and which tools are easiest to start with.
What AI Home Design Software Actually Does
Let's clear this up first, because the marketing language around these tools is often vague.
AI home design software takes a photograph of your existing room and generates a new version of that room in a different style — photorealistic, in seconds. The AI keeps the room's structure (walls, windows, doors, floor shape) and replaces everything else: furniture, decor, colors, textures, lighting atmosphere.
What it does not do:
- Redecorate your physical room (it's a visualization, not a service)
- Produce a shopping list automatically (though some tools have this in beta)
- Create architectural drawings or floor plans
- Guarantee that specific furniture pieces exist in real life
What it does do extremely well: show you what your room could look like in a style you've never tried, in under a minute, for free.
Beginner-Friendly AI Home Design Tools Ranked
Not all tools are equally accessible to first-timers. Here's how the main options rank on ease of use:
| Tool | Beginner Score | Free Tier | Time to First Result | Learning Curve |
|---|---|---|---|---|
| AI Smart Decor | 5/5 | No (from $29/mo) | ~20 seconds | None |
| RoomGPT | 4/5 | Yes (limited) | ~30 seconds | None |
| Reimagine Home | 4/5 | Yes (credits) | ~30 seconds | Minimal |
| Homestyler | 2/5 | Yes | 30–60 min | Moderate |
| Planner 5D | 2/5 | Limited | 1–2 hours | Moderate |
The top three are upload-and-go. The bottom two require manual room building — which is rewarding eventually, but not where a beginner should start.
AI Smart Decor is the clearest entry point: a quick preview before account setup, results arrive fast, and the interface has essentially no learning curve. It's a good tool to use for your first attempt before exploring others.
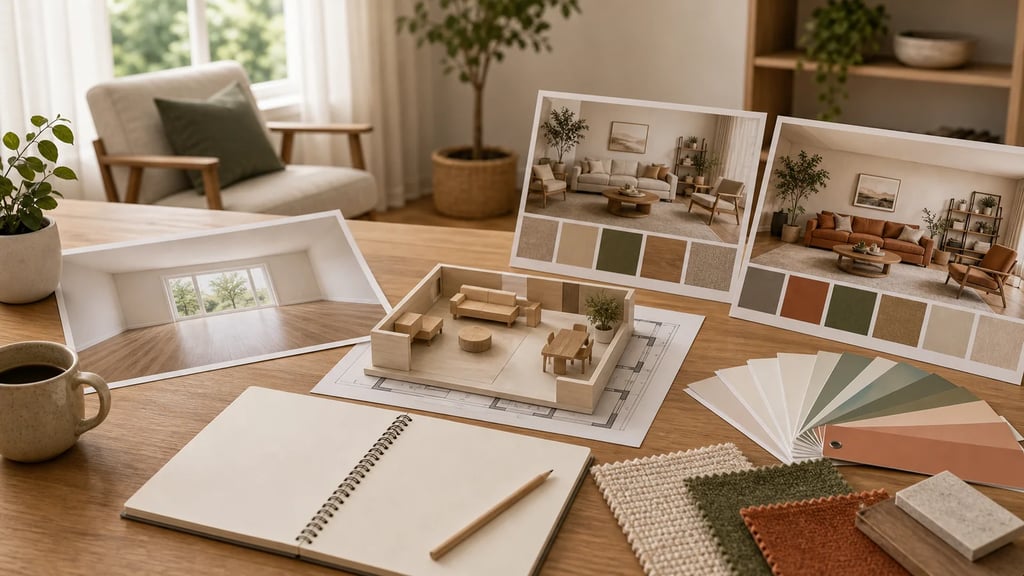
How to Take a Good Room Photo (This Matters More Than You Think)
The single biggest factor in getting a good AI redesign result is photo quality. A poor photo leads to a confusing result. Here's exactly what to do:
Do This:
- Shoot from a corner of the room, angled toward the opposite corner. This gives the AI the widest view of the space.
- Use natural daylight. Open blinds and curtains. Natural light produces even, accurate color rendering.
- Shoot in market (horizontal) orientation. Most AI tools expect wider-than-tall images.
- Get down to furniture level. Shooting from standing height makes ceilings look huge. Eye-level with the sofa or bed gives more natural perspective.
- Include at least two walls. Single-wall shots give the AI limited context about the room's shape.
- Keep the phone steady. A blurry photo produces a blurry redesign.
Avoid This:
- Flash photography — creates harsh shadows and blows out surfaces
- Extreme angles (wide-angle lens distortion confuses the AI)
- Very dark rooms — AI struggles to identify furniture shapes in low light
- Cluttered surfaces — the AI tries to keep or redesign clutter, which produces messy results
- Partial room shots — cutting off walls reduces the AI's ability to maintain structural consistency
You don't need a professional camera. A modern smartphone in good light is all you need.
Your First AI Home Design: Step-by-Step
Here's the exact process for your first AI redesign, using AI Smart Decor as the example:
- Take a photo of the room you want to redesign using your phone. Follow the photo tips above.
- Transfer the photo to your computer (AirDrop, cable, email, cloud sync — any method works). You can also use your phone's browser if you prefer.
- Go to aismartdecor.com in any browser.
- Upload your room photo using the upload button on the main interface.
- Browse the style options. You'll see names like Modern, Scandinavian, Farmhouse, Coastal, Industrial, etc. Don't overthink this — pick one that sounds appealing.
- Click Generate. The AI processes your image in the cloud. Results typically appear in 15–30 seconds.
- Look at the before/after comparison. You'll see your original room alongside the redesigned version.
- If you like it, save or download the result.
- If you don't, pick a different style and generate again. There's no limit to how many styles you can try.
The whole process takes about 3 minutes from first load to first result.
Understanding Your AI Results: What You're Looking At
First-timers sometimes feel confused by what the AI generates. Here's how to interpret results:
The AI preserved the room structure. Windows, doors, and wall positions should match your original photo. If they don't, your photo likely had too much distortion or too little context.
The AI replaced the soft furnishings. Sofas, chairs, rugs, curtains, cushions, and decorative items will be entirely different. This is intentional — it's showing you what the room could be, not what it is.
The AI changed wall colors and sometimes flooring. Styles like Scandinavian tend toward light walls and light floors. Industrial might bring in dark tones. This is accurate to the style — it's showing you the full transformation.
Some details may look slightly off. AI rendering in 2026 is very good but not perfect. Corners, complex furniture shapes, and very detailed rugs can sometimes have minor artifacts. This doesn't invalidate the design direction — it's a visualization, not a product photo.
Which Style Should Beginners Start With?
If you have no idea where to start, these five styles produce clean, widely appealing results that work in most room types:
1. Modern
Clean lines, neutral palette (whites, grays, beige), minimal clutter. The AI produces consistent, polished results with this style. Good for living rooms, bedrooms, and kitchens.
2. Scandinavian
Light wood tones, white walls, natural textures, cozy details. Very forgiving of awkward room shapes. Works exceptionally well in small spaces.
3. Farmhouse
Warm wood tones, white shiplap or painted walls, vintage-inspired furniture. Produces warm, inviting results. Great for kitchens and dining rooms.
4. Coastal
Blues, whites, natural fibers, light and airy atmosphere. Works particularly well in rooms with good natural light. Living rooms and bedrooms respond well.
5. Minimalist
The AI strips the room back to essentials. If your current room feels chaotic, this style shows you what clarity could look like.
Avoid highly complex styles (Maximalist, Baroque, Eclectic) for your first few attempts — they require more from the photo and produce more variable results.
Common Beginner Mistakes and How to Avoid Them
Mistake: Judging AI on one result Always generate at least 3–4 versions across different styles before deciding the tool isn't for you. The first result rarely captures what's possible.
Mistake: Using a photo from 3 years ago Old photos often have different furniture arrangements, different lighting conditions, and lower resolution. Take a fresh photo of the room as it currently exists.
Mistake: Expecting the redesign to be shoppable immediately The AI generates a design direction, not a furniture catalog. Use it to identify the style you want, then shop for similar pieces.
Mistake: Only trying one room Different rooms respond to AI redesign differently. If your bedroom result is underwhelming, try the living room. Most people find one room where the AI really clicks for them.
Mistake: Upgrading immediately Free tiers cover most beginner needs. Use the free version for at least a week before deciding you need a paid plan.
What to Do After You Get a Result You Like
A good AI redesign is the beginning of the process, not the end:
- Screenshot or download the result: you'll forget it if you don't save it
- Use it as a mood board reference when shopping for furniture or paint
- Show it to your partner or family to match on the direction before spending money
- Use it when talking to contractors: a visual reference communicates far more than words
- Generate a few variations of the style you liked to explore different color palettes within that direction
- Try the same style on multiple rooms to see if you want a consistent look throughout the house
For a full comparison of all available tools, see the AI home design software guide. And if budget is a concern, the best free AI home design software guide covers all the no-cost options in detail.
The Honest Limitations to Know About
AI home design software is powerful, but it doesn't do everything:
- It won't tell you if a design is structurally feasible for renovation
- It won't give you precise measurements or product SKUs
- It won't factor in your existing furniture unless you photograph it in the room
- Results vary — some photos produce stunning results, others produce mediocre ones
- It's a visualization tool, not an interior designer
None of these limitations should stop you from trying it. For what it does — showing you what a room transformation could look like — it's genuinely useful and genuinely accessible to anyone.
Start Here
AI Smart Decor is the best entry point for first-time users. Plans start at $29/month (Lite), there's no download required, results arrive in under 30 seconds, and the interface requires no instructions to navigate. Take a photo of any room in your home right now and you'll have your first AI redesign in less than five minutes.