Virtual staging has become a cornerstone of modern real estate marketing. Professionally staged listings sell faster and for more money — that much is well established. But what if you want to handle it yourself, without hiring a staging service and without relying on AI to do the heavy lifting?
DIY virtual staging is absolutely possible. People were doing it long before AI tools existed, using nothing more than photo editing software and patience. This guide is for those who want to learn how to virtually stage a home with their own hands, using free or affordable tools, and who want an honest picture of what that process actually looks like.
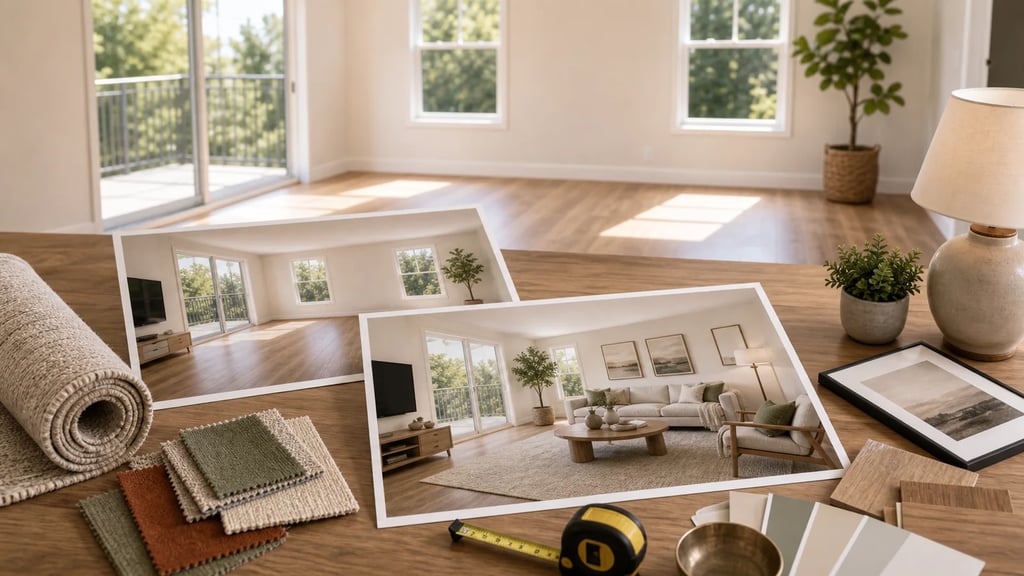
Want to try it now? Use the free AI virtual staging tool to test AI staging first, then decide whether manual DIY editing is worth the time.
What DIY Virtual Staging Actually Means
When we say "DIY virtual staging," we mean the fully manual approach: you take a photo of an empty room, open it in an image editor, and composite furniture, rugs, art, and decor into the scene yourself. You handle the perspective, the lighting, the shadows, and the color matching.
This is different from using an AI staging tool where you upload a photo and get a furnished result in seconds. DIY staging is closer to graphic design work. It demands time, some technical skill, and a decent eye for interior design. But for people who enjoy that kind of work — or who want total creative control — it can be genuinely rewarding.
Free and Affordable Tools for DIY Virtual Staging
You do not need expensive software to stage a room digitally. Here are the main tools people use for manual virtual staging.
GIMP (Free, Open Source)
GIMP is the gold standard for free image editing. It supports layers, masks, perspective transforms, and all the blending tools you need to composite furniture into a room photo. The learning curve is real — GIMP's interface is not easy to use for beginners — but there are hundreds of tutorials available online. If you are serious about virtual staging yourself and do not want to pay for software, GIMP is where you should start.
Canva (Free Tier Available)
Canva is not a traditional photo editor, but it works surprisingly well for basic staging tasks. You can layer PNG furniture cutouts over room photos, adjust transparency, and resize elements. Canva's strength is its simplicity: anyone can use it within minutes. The limitation is precision. You will not get the fine-grained control over shadows, perspective correction, or color grading that a proper editor provides. Canva works best for quick, presentable results rather than photorealistic staging.
Adobe Photoshop ($22.99/month)
Photoshop remains the industry standard for a reason. If you already have a Creative Cloud subscription, it offers the most powerful set of tools for virtual staging: advanced layer blending, perspective warp, shadow generation, lighting effects, and smooth compositing. Professional virtual stagers who work manually almost always use Photoshop. The trade-off is cost and complexity — this is a professional tool with a professional learning curve.
Planner 5D (Free Tier Available)
Planner 5D takes a completely different approach. Instead of editing photos, you build a 3D model of the room and furnish it virtually, then render a view that matches your camera angle. This can produce impressively realistic results because the software handles lighting and perspective natively. The paid tier is limited in furniture options, but the premium plan gets a large catalog. The downside is that recreating your exact room dimensions and angles takes considerably more time than photo-based staging.
Homestyler (Free)
Homestyler, from the makers of AutoCAD, is another 3D room planning tool. You draw your floor plan, place furniture, and render photorealistic images. Homestyler's rendering quality is strong for a free tool, and its furniture library is extensive. Like Planner 5D, the bottleneck is setup time — you need to model the room before you can stage it.
Step-by-Step DIY Virtual Staging Process
Here is a practical walkthrough for staging a room yourself using photo editing software like GIMP or Photoshop.
Step 1: Photograph the Empty Room
Good staging starts with a good base photo. Shoot from a corner of the room to capture the widest possible angle. Use a tripod to keep the camera level — tilted photos make furniture compositing much harder. Shoot during the day with curtains open for even, natural lighting. Avoid flash. Take multiple shots from different angles so you have options.
Step 2: Find Furniture Assets
You need PNG images of furniture with clear backgrounds. Search for "furniture PNG cutout" or "sofa clear background" to find resources. Websites like PNGTree, CleanPNG, and FreePNG offer free assets. For higher quality, sites like DesignConnected sell professional furniture cutouts specifically made for architectural visualization. The quality of your assets directly determines the quality of your final image.
Step 3: Import and Place the Base Furniture
Open your room photo in your editor and import a furniture PNG as a new layer. Resize and position it so it sits naturally on the floor. Pay close attention to the perspective — if your photo was taken at a slight downward angle, furniture shot straight-on will look wrong. Use perspective transform tools to match the angle. Start with the largest piece (typically a sofa or bed) and build around it.
Step 4: Match Lighting and Color
This is where most DIY attempts fall apart. The furniture asset was photographed or rendered under different lighting than your room. You need to adjust brightness, contrast, color temperature, and saturation so the furniture looks like it belongs in the space. In GIMP or Photoshop, use Curves, Levels, and Hue/Saturation adjustments on each furniture layer individually.
Step 5: Add Shadows
Furniture without shadows looks pasted on — because it is. Create a new layer beneath each furniture piece and paint soft, dark shadows where the furniture meets the floor. Use a low-opacity black brush with a soft edge. Study how shadows fall in the original room photo and mimic that direction and intensity. This single step makes the biggest difference between amateur and convincing results.
Step 6: Add Secondary Decor
Once major pieces are placed, add smaller items: a coffee table, lamps, throw pillows, a rug, wall art. These details sell the illusion. Do not overcrowd the room — staging should make a space feel inviting, not cluttered. A good rule is to stage a room the way a furniture catalog would: clean, intentional, and aspirational.
Step 7: Final Review and Export
Zoom out and evaluate the full image. Check that all furniture sits on the same plane, that lighting is consistent, and that nothing looks obviously composited. Ask someone else to look at it with fresh eyes. Export at full resolution for your listing photos.
Skills You Actually Need
Let's be honest about the skill requirements. To produce virtual staging that looks professional enough for a real estate listing, you need:
- Basic photo editing proficiency. You should be comfortable with layers, masks, and selection tools. If you have never used GIMP or Photoshop, expect to spend several hours learning before you produce anything usable.
- An understanding of perspective. Furniture must match the camera angle of the room photo. This requires either an easy to use eye or willingness to study one-point and two-point perspective.
- Color and lighting awareness. Matching the color temperature and lighting direction across composited elements is genuinely difficult and comes with practice.
- Interior design sense. Knowing which furniture to place, where to put it, and what style appeals to buyers is a separate skill from the technical editing.
If you have a background in graphic design, photography, or interior design, DIY staging will come naturally. If you are starting from zero, expect a steep learning curve and results that improve significantly over your first five to ten attempts.
When DIY Virtual Staging Makes Sense
DIY staging is a good fit in specific situations:
- You enjoy the creative process. If you find photo editing satisfying and want to develop the skill, DIY staging is a legitimate creative pursuit.
- You have more time than budget. A single manually staged image might take one to three hours, but the software cost can be zero.
- You want total control. DIY lets you place exactly the furniture you want, in exactly the position you want, with exactly the style you want. No AI interpretation involved.
- You are staging for personal projects. Visualizing a renovation, planning a furniture purchase, or creating mood boards for your own home are all great use cases where speed matters less.
When AI Is the Smarter Choice
Here is the honest truth: for most people in most situations, AI virtual staging tools produce better results in a fraction of the time.
A tool like AI Smart Decor can stage a room in under thirty seconds with results that are photorealistic, properly lit, and correctly proportioned. The AI handles perspective, shadow generation, color matching, and furniture placement automatically. What takes an experienced editor one to two hours to do manually, AI handles almost instantly.
If you are a real estate agent staging listings regularly, or a homeowner who needs staged photos for a sale, the time math overwhelmingly favors AI. You can explore different options in our guide to virtual staging platforms or browse free virtual staging software to find what works for your budget.
DIY staging has its place, but it is a craft that requires practice to do well. AI tools have raised the floor dramatically — a first-time user with an AI tool will almost always outperform a first-time user with Photoshop.
Realistic Expectations for DIY Quality
If you are new to photo editing, your first few DIY staging attempts will likely look noticeably composited. Furniture may appear to float, lighting will not quite match, and proportions might be off. This is normal. Professional virtual stagers who work manually have years of experience.
With practice — say ten to twenty staged rooms — your results will improve substantially. You will develop shortcuts, build a library of furniture assets you trust, and internalize how to match lighting quickly. But reaching the point where your DIY staging is indistinguishable from a professional service or an AI tool takes genuine effort.
For listings where presentation quality directly impacts sale price, consider whether the learning curve is worth the risk. For lower-stakes applications, DIY staging is a perfectly valid approach.